Step 1 - Remove road wheels and brake drums
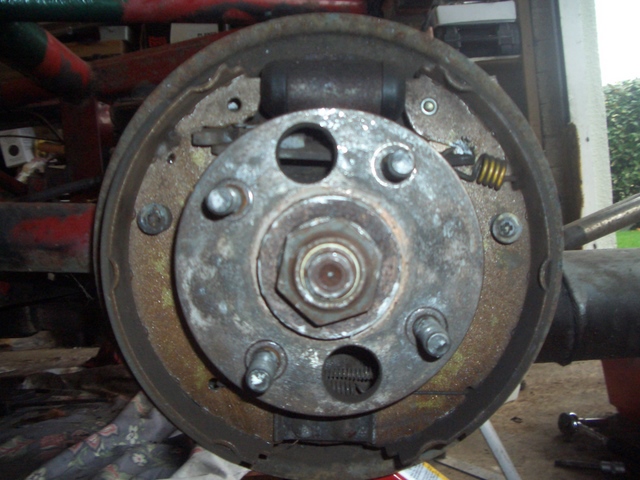
Step 2 - Remove Brake Shoes (photo shows layout) by removing spring retaining clips (one through each shoe) and unclipping top spring. Pull shoes apart and remove over hub.
REMOVAL OF TRAILING ARMS
| Brake Internals | ||
| |
Step 1 - Remove road wheels and brake drums Step 2 - Remove Brake Shoes (photo shows layout) by removing spring retaining clips (one through each shoe) and unclipping top spring. Pull shoes apart and remove over hub.
|
|
| View | ||
| Brakes from Above | ||
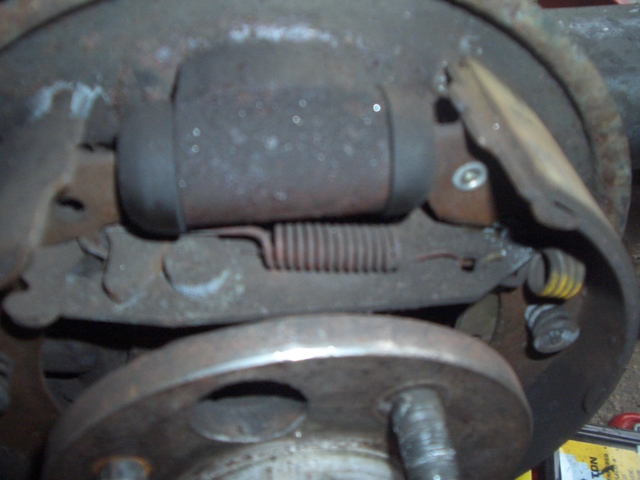 |
Step 3 - Remove handbrake cable from shoe - pull handbrake lever away from shoe and manouevre cable to pull lug through circular cut out. Step 4 - Remove Handbrake Cable from Drum Back Plate - Remove retaining clip (it twists round to split and then can be prised apart to slip over cable) and pull cable back through disc backing metal Step 5 - Remove Coil Over Springs |
|
| View | ||
| Drive Shaft | ||
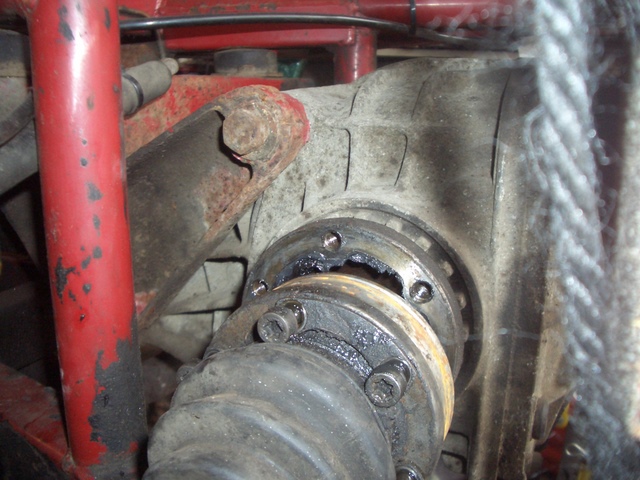 |
Step 6 - Remove 6 hex headed bolts from Drive shaft inner CV Joint and free from final drive unit (cover with plastic bag to protect from dirt and tape up). You can also remove from back of hub if you wish - I didn't as 2 had just been replaced and the other ones where F*****g tight and I didn't want to strip threads or round the heads. | |
| View | ||
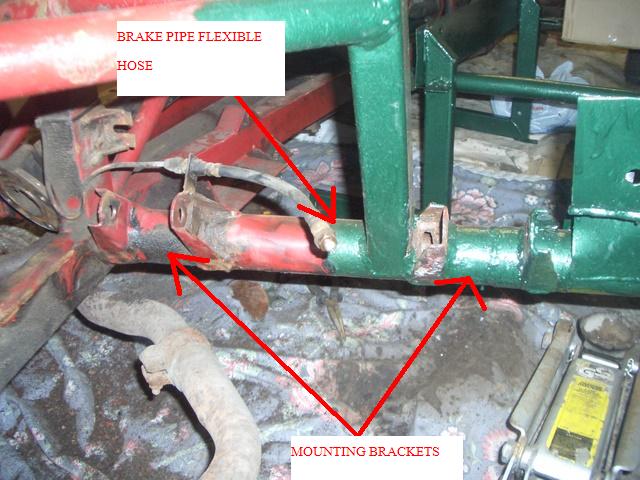
| Brake Pipe Connections | ||
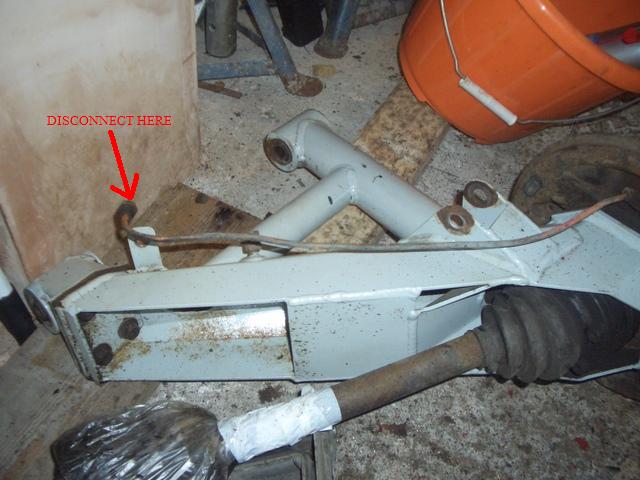 |
Step 7 - Undo and disconnect brake pipes at joint between flexible and solid pipe to drum | |
| View | ||
| Trailing Arm Brackets | ||
 |
Step 8 - Undo bolt support bolts (note bolt heads are 21mm which is unusual - nuts are 22mm) Step 9 - Supporting drive shaft carefully lift trailing arm away from chassis for work |
|
| View | ||